Use your Windows PC and a HT to send and receive APRS Packets
To send and receive APRS packets you’ll need:
- A radio. I am using a tidradio h3
- A digirig mobile interface
- The correct cable for your radio to interface with the digirig. I am using a K1 cable.
- A Windows PC
- Pinpoint APRS Software https://pinpointaprs.com/index.html
- Soundmodem v1.14 http://uz7.ho.ua/packetradio.htm
Before connecting your DigiRig to your computer open your device manager and look for the tab that says Ports (COM and LPT)
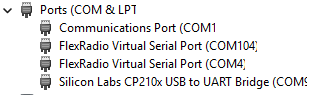
Plug in your DigiRig and watch the device manager to see what com port it is using. In my picture above you can see mine is com 9 and listed as Silicon Labs CP210x USB UART Bridge. Remember the com port number because you’ll need it later.
Hook your DigiRig to your radio and turn the radio on.
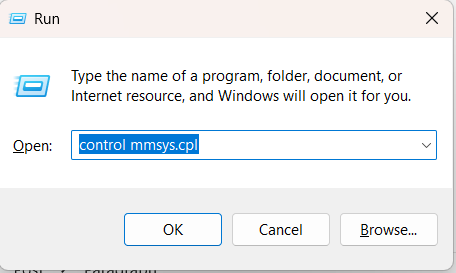
Hit windows key and r to open the run box. Type control mmsys.cpl in the run box to open your audio settings.
You’ll see your DigiRig listed as a USB PnP Sound Device. Right click and select Properties -rename it to something like DigiRig in both the Playback and Recording TABS.
In the Playback TAB click your DigiRig and select properties – levels. Set the Speakers Level to 100 and the Microphone Level to 15 and click OK.
In the Recording TAB click your DigiRig and select properties – Custom and uncheck AGC then click Levels and set the level to 0
You may have to play with your levels to suit your needs but this is what works for me. Make sure your DigiRig is NOT SET TO DEFAULT. ONLY SET IT TO DEFAULT IF NOTHING ELSE WORKS. IF IT IS SET AS THE DEFAULT DEVICE IT WILL PLAY SYSTEM SOUNDS OVER THE AIR. Set your speakers / other microphone as default not DigiRig.
The first time you open soundmodem and PinPoint APRS you might get a Windows prompt to allow firewall access answer yes or allow for both programs or they won’t work since they can’t send data to each other because the firewall is blocking them.
Open Soundmodem and click Settings – Devices

The above setting are what you need. Select output device to be the same as your DigiRig same with the input device. Check Single channel output and check Color waterfall. Check enabled for AGWPE server and for KISS Server. Leave the ports the same unless you are using those ports for something else. Set your PTT Com port to the port you took note of when you plugged your DigiRig in for the first time. If you forgot go check your device manager again and you can unplug / plugin the DigiRig to see what port it is using.
Click OK
Click Settings – Modem and make sure yours looks like this photo. Nothing should need to be done here but make sure KISS Optimization is checked

That should be all of the set up you need to do for Soundmodem v 1.14 if you are using a DigiRig. Other radios or sound cards might need additional settings changed but I have no idea about that.
Open PinPoint APRS. The first time you open PinPoint it will start on the settings page.

Enter your call sign with whatever APRS identifier you want. I used -3 for mine as you can see from above. Select your preferred APRS Path or leave it as it is. Check the boxed for APRS beaconing to your own preference.
Click TNC and change the TNC type to network KISS mode and check Connect TNC automatically.

Make sure the network TNC settings are correct 127.0.0.1 and port 8100
Everything else is things you can set up on your own. If you want you can use PinPoint APRS as an IGate by setting up the APRS-IS section. In the GPS section you can set up your info so when you beacon it has you in the right place. Read the Quick Start guide on PinPoints website for more detailed info.
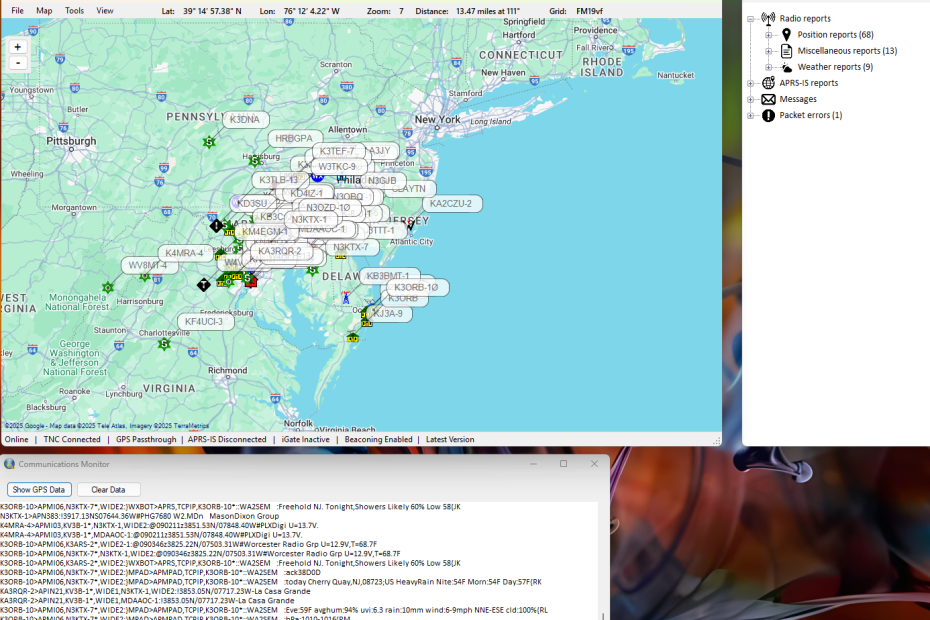
Now that you have everything set up you should have something going on that looks like this:
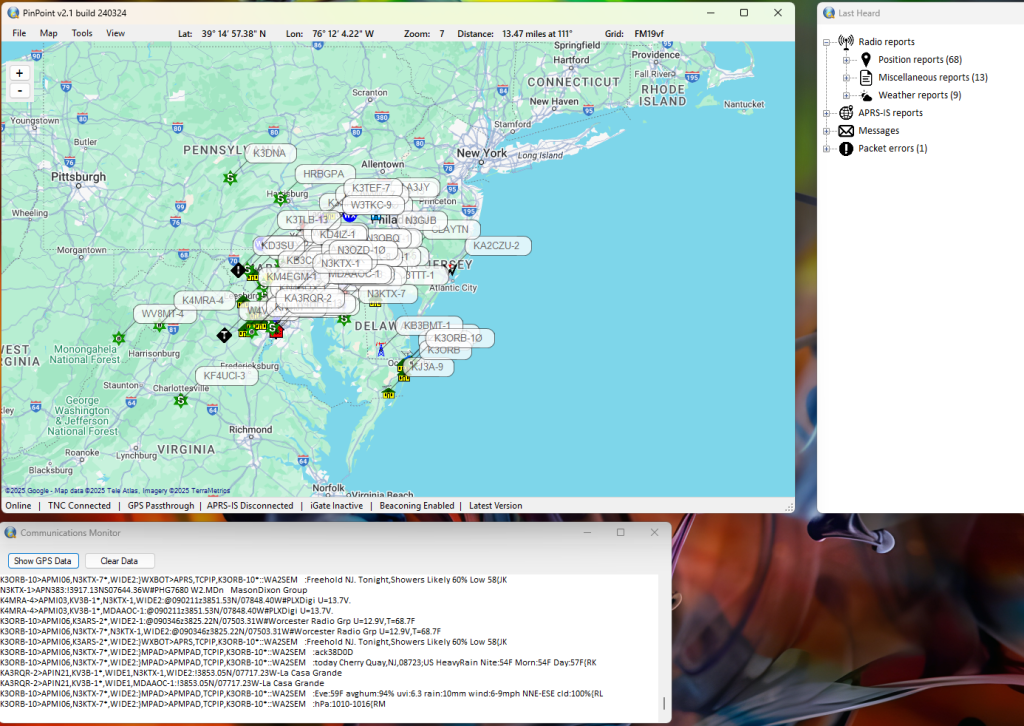
If you are not seeing stations on the map or APRS messages in the communication monitor window, lower or raise the volume on your radio. I’ve found that if you open the soundmodem program and look at the waterfall you want it to look about like this:

Too much volume or to little volume will stop you from decoding packets. Make sure the radio squelch is set to open or 0 and the mode is set to FM and that the radio is on your APRS freq i.e 144.3900. You should see reports coming in soon after starting the programs if you have active APRS users in your area.
You can send a variety of messages from PinPoint APRS and read messages sent to you.
In a future post I will talk about using PinPoint APRS to sending and receiving Winlink Messages over APRS.
 English