
Things you will need for this project
- Raspberry Pi Zero 2 W Amazon Link
- Raspberry Pi Zero 2 W power supply Amazon Link
- Micro SD Card Amazon Link
- SD card reader to flash your Pi OS from your PC Amazon Link
- Micro USB to USB cable Amazon Link
- RTL-SDR Dongle Amazon Link
- Optional – Antenna for 2m Amazon Link
- Optional – SO239 – SMA Adapter Amazon Link
- Optional – Case for Raspberry Pi Zero 2 W Amazon Link
This guide is basically the same as the guide that can be found here https://www.regnatarajan.com/radio/create-aprs-receive-only-igate-raspberry-pi
I made a few small changes in how I did things and some of the extra stuff added to the config files. Reg – VA7ZEB Did the heavy lifting and made the framework for this.
Installing Pi OS and setting up the Pi Zero 2 W
Download and flash the latest Raspberry Pi Image and Pi OS image https://www.raspberrypi.com/software/
Flash the 32 bit Full version of Pi OS Bookworm
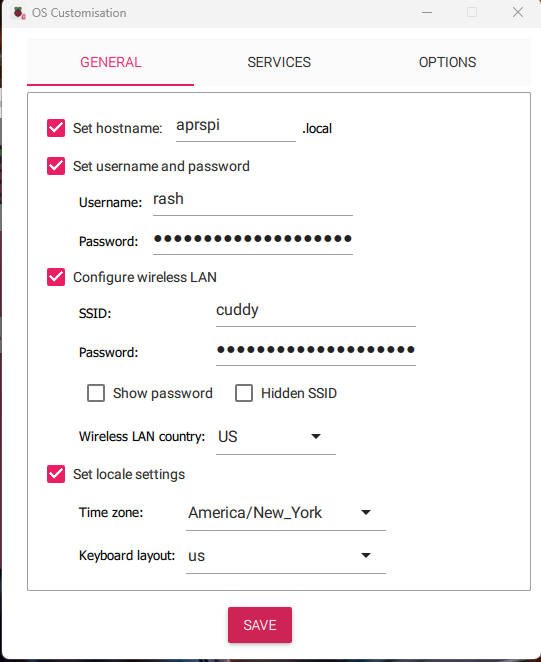
When flashing Pi Imager will ask if you want to apply Custom OS settings. Select yes then set a host name – here you can see I selected aprspi. Set a username and password and configure your wireless internet connection and locale settings.

Under services enable SSH. You can use password auth or public-key. Your Choice I choose password here and it uses the password and user name that you chose on the previous page.
Click save and then write the image to your SD card.
Once you have the Pi OS flashed, place the card in the Pi Zero and connect the power supply.
Set up the Pi Zero for APRS Igate
Use Putty or your favorite SSH client to SSH into your Pi Zero.
Plug in your RTL-SDR Dongle.
Run the following commands from your PI Console
sudo raspi-configThis brings up a GUI Menu – Select Option 3

Select Option i3 VNC

Enable the VNC then click finish and save / reboot the Pi Zero 2 W
Once it reboots SSH back into the Pi and run the following commands one at a time. Some commands might take some time to complete so please be patient.
sudo apt update
sudo apt upgrade
sudo apt install cmake build-essential libusb-1.0-0-dev libasound2-dev libudev-dev -y
cd /usr/src
sudo git clone https://www.github.com/wb2osz/direwolf
cd direwolf
sudo mkdir build && cd build
sudo cmake -DUNITTEST=1 ..
sudo make -j4
sudo make test
sudo make install
cd /usr/src
sudo git clone https://git.osmocom.org/rtl-sdr.git
cd rtl-sdr
sudo mkdir build && cd build
sudo cmake ../ -DINSTALL_UDEV_RULES=ON -DDETACH_KERNEL_DRIVER=ON
sudo make
sudo make install
sudo ldconfig
sudo rtl_testAfter running rtl_test you can hit ctrl-c and exit the test if it was successful
Set up your Igate config files
nano ~/igate.confThis opens up a blank file in your home directory called igate.conf in the nano editor. Paste the following into the editor and make changes to the following parts of the file.
Change YOURCALLSIGN-10 to your actual callsign i.e N3EMC-10
Change YOURCALLSIGN YOURPASSCODE to your actuall callsign and passcode i.e N3EMC 12345
Get your passcode from here or any other APRS passcode generator.
Change your location settings. In this file the degree symbol is replaced with ^. Get your location from here and enter into the file or use any site that gives you your GPS location. If you use aprs.fi just place the cursor in the place you want coordinates from and look that the top right of the screen for the location.
# Set the sound card to null
ADEVICE null null
CHANNEL 0

# Put your callsign here.  It is common to add "-10" to the end.
MYCALL YOURCALLSIGN-10

# Enter your callsign (no "-10" this time) and your passcode.
# If you don't have one, get your passcode at http://apps.magicbug.co.uk/passcode/
IGLOGIN YOURCALLSIGN YOURPASSCODE

# The IGSERVER defaults to North America.
# If you prefer a different server, use one of these:
#      noam.aprs2.net - North America
#      soam.aprs2.net - South America
#      euro.aprs2.net - Europe and Africa
#      asia.aprs2.net - Asia
#      aunz.aprs2.net - Oceania
IGSERVER noam.aprs2.net

# Set your iGate up to beacon itself every 60 minutes.
# IMPORTANT: Change your latitude/longitude to your own coordinates.
PBEACON sendto=IG delay=0:30 every=60:00 symbol="igate" overlay=R lat=42^37.14N long=071^20.83W comment="RaspberryPi RTL-SDR IGate https://pigate.dev"
Hit ctrl-x then Y then enter to save the file.
Make your script to start your Igate.
nano ~/igate.shCopy and paste the following into igate.sh and make the following change.
Change USERNAME to your Pi username. If you want to or need to use a different APRS frequency change the 144.39M to your local APRS freqency.
#!/bin/bash
export DISPLAY=":0"
DWCMD="direwolf -c /home/USERNAME/igate.conf -r 24000 -D 1 -T \"Timestamp: %F %T\""
LXCMD="bash -c 'rtl_fm -f 144.39M - | $DWCMD -'"
sleep 30
/usr/bin/lxterminal -t "iGate" -e "$LXCMD"Copy the following to make your script executable.
chmod +x ~/igate.shExit your SSH session and start a VNC session I use RealVNC as my client.
Once you are logged into your VNC session click the terminal window at the top of the desktop and enter the following to start your Igate.
sudo ~/igate.shThis will start your igate after a 30 second delay. You should have a window open that looks like this.
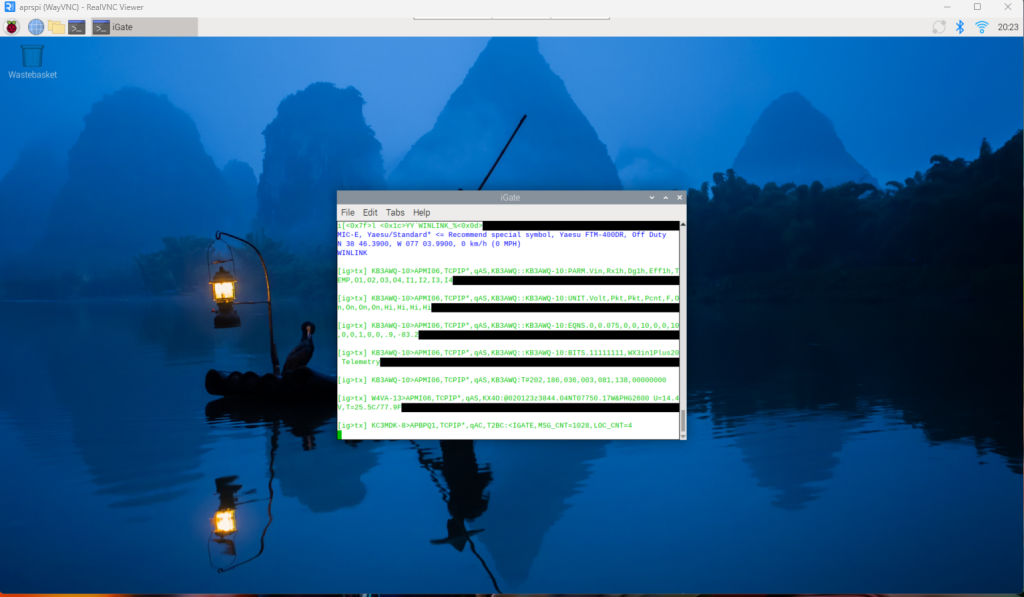
You can exit your VNC session at any time and the program will run on your pi until you turn it off or close the iGate window by logging back into a VNC session with your Pi Zero. You’ll notice there is some lag because the pi zero 2 W doesn’t have a lot of processing power to run a desktop. I am sure there is a lighter desktop you can install to make it work faster but this works okay for me.
Make your iGate autostart
This will make your script auto start when your pi is rebooted. Run the following commands in a terminal one at a time.
mkdir ~/.config/autostart
nano ~/.config/autostart/igate.desktopEnter the following into the blank file. Change USERNAME to your pi username
[Desktop Entry]
Type=Application
Name=iGate
Exec=sh -c "sudo /home/USERNAME/igate.sh"Hit ctrl-x press Y and hit enter.
The site I found all of this information from is https://www.regnatarajan.com/radio/create-aprs-receive-only-igate-raspberry-pi
I made some changes in how this was written and posted what worked for me. I tried to follow some of those 10 minute APRS igate videos but never could make it work. I think the key to this is the manually building and making the direwolf and rtl-sdr files. Chances are you will have your own issues with hardware or with direwolf. There are a ton of guides for this so look for newer ones and try to combine things that work.
 English